How Much Food & Water Should You Store For Emergencies? A Practical Introduction To Prepping
That road you’re looking at? It used to be a road. Now it’s a river of debris, and the bridge that connected it to the outside world is gone too. No cell service. No electricity. And help isn’t coming anytime soon. That’s the reality I witnessed firsthand during search and recovery operations in Tennessee and North Carolina after Hurricane Helene, and it completely changed how I think about emergency preparedness.
Getting started with emergency preparedness — often called “prepping” — can feel overwhelming. There seems to be an endless list of things you’re supposed to do to be ready for the worst. My goal here is to break things down into small, manageable pieces you can actually apply in your own life, starting with one of the most common questions I get asked: how much food and water should you actually store, and for how long?
Why My Recommendation Changed After Hurricane Helene
For years, my standard advice was to keep one to two weeks’ worth of food and water on hand. That number worked fine in theory, but after spending time on the ground during Hurricane Helene’s aftermath, I saw how badly it fell short in a real, prolonged disaster.
People were trapped in their homes, physically unable to leave because roads were washed out, bridges were gone, and the terrain was simply too dangerous to cross. Even when supply points were set up at churches and private compounds, it didn’t matter if residents couldn’t get out of their own neighborhoods to reach them. Rescue and relief took far longer than anyone expected, not because the government wasn’t trying, but because it’s rarely the government that shows up first. It’s your community — neighbors, local volunteers, and organizations — doing the actual boots-on-the-ground work to reach people who are cut off.
Based on what I saw, my new recommendation is a minimum of four weeks of food and water for every person in your household. That’s not an exaggeration or a worst-case fantasy — it’s a realistic baseline based on how long it can actually take for help to reach isolated areas after a major disaster. And if your budget and storage space allow, there’s nothing wrong with building beyond that.
Step 1: Start Building Your Food Supply Without Breaking the Bank
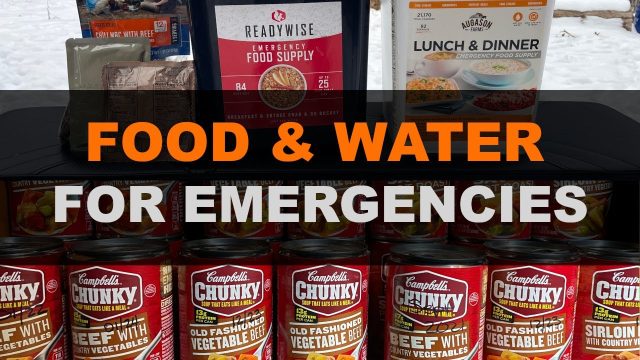
You do not need to buy an expensive prepper kit to get started. When my family got serious about prepping after moving into our cabin, we didn’t buy anything fancy at first — we simply started picking up a few extra cans of food every time we went to the grocery store.
Whenever one of us does a grocery run, we walk down the canned food aisle and grab whatever is on sale — usually four to twelve cans at a time. It doesn’t feel like much in the moment, but it adds up fast. We also write the purchase date directly on the can labels with a marker, which makes it easy to practice “first in, first out” rotation — always cooking from your oldest cans first so nothing expires unnoticed.
Canned food is also what we reach for on snow days or evenings when we don’t feel like cooking a full meal from scratch. Yes, canned goods contain preservatives, but in an emergency-prep context, that’s actually a feature, not a bug — it’s what allows the food to last for years on a shelf.
Step 2: Add Emergency Food Buckets for Dense, Long-Term Calories
Once you’ve built a base of canned goods, emergency food buckets — like the ones from companies such as Augason Farms or ReadyWise — are a solid next step. These buckets stack well, store for a long time, and pack a lot of calories into a small footprint.
That said, I’ll be honest with you: the food inside these buckets isn’t exactly “healthy” by everyday standards. Most of it is oats, oatmeal, sugary drink mixes, dehydrated potatoes, beans, and rice. It’s heavy on carbohydrates and light on nutrition compared to what we’d normally choose to eat day to day.
But that’s not really the point. These buckets aren’t meant for regular meals — they’re meant to keep you alive if you’re stuck at home for a month or two with no other options. In that scenario, dense calories matter more than nutritional perfection. Just don’t rely on them as your only food source, especially for protein.
Step 3: Diversify — Combine Canned Goods and Emergency Buckets for Protein
Most freeze-dried or dehydrated emergency food kits are seriously lacking in one critical area: meat and protein. If you’re going to be physically active during an emergency — clearing debris, repairing property, hauling supplies — your body is going to need real protein to keep functioning.
This is where canned meats and proteins fill the gap. By combining shelf-stable emergency food buckets with canned proteins (chicken, tuna, beef, etc.), you end up with a well-rounded emergency pantry that covers both calories and nutrition. Diversification is the key word here — don’t rely on just one type of food storage.
Step 4: Consider Home Canning for the Next Level of Food Security
Once you’re comfortable with store-bought canned goods and emergency buckets, the next step up is learning to can your own food. My wife makes homemade jams from berries and foraged flowers — including a dandelion jelly that’s surprisingly calorie-dense and completely homemade. We also can pickles and a variety of vegetables, both from our garden and from the store.
When hunting season comes around, we can venison from deer we harvest, and we also can beef from a cow we buy from a local farmer. It takes more time and effort than tossing a can in the pantry, but it opens the door to making your own hearty, high-quality meals — think homemade stews with potatoes, vegetables, meat, and good fats, all shelf-stable and ready to go during an emergency. You control exactly what goes into it, and you don’t have to worry about depending on processed, oatmeal-heavy survival food for weeks on end.
Step 5: If Your Budget Is Tight, Prioritize Water First
If you can only afford to focus on one category to start, make it water. It’s inexpensive — a large pack or “brick” of bottled water from the grocery store costs just a few dollars and is one of the easiest ways to start building an emergency supply.
Yes, there are valid concerns about microplastics and long-term plastic bottle use, but in a genuine emergency situation, that’s a secondary concern. The priority is having enough clean water to survive and function.
Here’s the hard truth: the human body can only survive three to four days without water. And if you’re out working during a disaster — clearing storm debris, repairing damage, hauling supplies so you can eventually get to a store — you will be burning through water faster than you think. Staying hydrated is arguably the single most important thing you can do in any emergency.
For storage, bottled water is a great starting point, but you can also invest in larger potable water tanks (25- to 30-gallon containers) that can be kept in a basement or storage area. As a rule of thumb, plan for at least one gallon of water per person, per day — not the half-gallon figure you’ll often see recommended elsewhere. Based on my own experience doing physical labor during disaster response, a half-gallon simply isn’t enough if you’re active and working outdoors.
Step 6: Have a Water Filtration Backup Plan
In addition to stored water, it’s smart to have a portable water filter on hand. I personally carry a Sawyer straw filter, a compact filtration device that lets you drink safely straight from almost any water source — streams, ponds, even murky mud puddles. I’ve carried this same filter during search and recovery work in North Carolina and Tennessee, as well as during relief work in Haiti, and it’s proven itself as a reliable backup.
Another option is a gravity-fed filter bag system: you fill a bag with untreated water, hang it up, and let gravity pull the water down through a filter straw into a clean collection container. It’s a great way to filter larger quantities of water at once for a group or family.
One important safety note: wherever your mouth makes contact with a filter straw, that area must stay clean and sanitized. If you dip the filter into dirty water and then touch the mouthpiece with contaminated hands, you can get just as sick as if you’d drunk the untreated water directly. Always be mindful of cross-contamination when using these devices.
Keep in mind that filters are only useful if you have access to a water source in the first place — and that access isn’t always guaranteed. When I arrived in North Carolina after Hurricane Helene, many rivers were buried under four, five, even ten feet of silt before you could even reach flowing water. Add in fallen trees, floating debris, and other hazards in the water, and simply reaching a river became a legitimately dangerous task — you risk being struck by debris, pulled under by current, or having clothing snagged on submerged objects.
Because of that risk, I recommend treating stored water as your primary supply and portable filters as a backup — not the other way around. Your emergency could easily stretch beyond four weeks, and having a filtration option in reserve gives you a second layer of security if your stored water runs low.
Building Your Supply Over Time
None of this needs to happen overnight, and it shouldn’t. What I’ve described here is exactly how my family built up our own supply — a few extra cans here, some extra water there, consistently, over time. It took us a while to reach the point where we now keep roughly eight weeks’ worth of food and water on hand at any given moment.
You don’t need to treat every single day like a looming emergency, and you shouldn’t live in fear. Just keep it in the back of your mind, and chip away at it consistently. From here, there are even more steps you can take — growing your own food, collecting rainwater, and building broader self-sufficiency skills. I’ll be covering all of that in future videos as we continue documenting our own preparedness journey, so subscribe if that’s something you want to follow along with.
Hope you all have a great week, and I’ll see you in the next one.