How To Program The Radioddity GM-30 GMRS Radio: A Beginner’s Guide
If you just picked up a Radioddity GM-30 handheld GMRS radio and you’re not sure where to start, this guide is for you. GMRS stands for General Mobile Radio Service — a licensed radio service that allows short-distance two-way communication, commonly used for family communication, outdoor activities, and emergency preparedness. This tutorial is intentionally basic. We’re not diving into advanced menu options or technical radio jargon. Instead, this is meant to get you up and running straight out of the box: unbox it, charge it, turn it on, and know exactly how to use it.
Think of this as the “bare necessities” guide — everything you’d realistically need to know if you had to rely on this radio in an emergency situation. By the end of this post, you’ll understand how to navigate the menus, switch between channel mode and frequency mode, scan NOAA weather channels, adjust squelch, and actually talk on the radio properly. Let’s get into it.
Step 1: Learn the Navigation Buttons
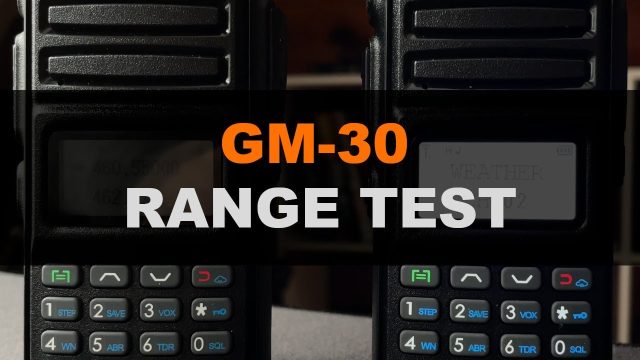
All the basic navigation on the GM-30 is handled using the top row of buttons on the radio.
- Leftmost button (Menu): This is your main menu button. Press it to enter the radio’s menu system, and also to switch between Channel Mode and Frequency Mode.
- Up and Down buttons: Use these to scroll through menu options and navigate between screens.
- Rightmost button (Back/Return): This button backs you out of menus or screens. You’ll notice a small blue cloud icon on this button — that’s because it doubles as a secondary function button. Press and hold it for a few seconds to activate that secondary feature, which in this case launches the weather scanning function.
Step 2: Understand Channel Mode vs. Frequency Mode
Out of the box, your GM-30 will be set to Channel Mode. This is the mode you’ll use most often, since it’s what allows you to communicate with other people using GMRS radios set to the same channel.
Frequency Mode, on the other hand, lets you manually type in a custom frequency. This isn’t necessarily “more advanced,” but it’s a mode you’ll typically use for listening rather than transmitting. For example, you might punch in your local EMS or fire dispatch frequency, or your sheriff’s or police department’s frequency, to monitor radio traffic. Ham radio operators (licensed amateur radio users) also use specific frequencies you could program in just for listening purposes.
So the simple way to think about it: Channel Mode is for talking, Frequency Mode is for listening outside of standard GMRS channels.
When you first power on the radio, you’ll see a screen preset to Channel 1, with a second bank below it showing “RPT-8.” Don’t let that confuse you — RPT-8 is simply the radio’s internal label for a repeater channel, and it corresponds to official GMRS Channel 30. If you look to the right side of the screen, you’ll see the actual GMRS channel numbers listed (like 001 and 030), which is the number you should reference if the repeater labeling throws you off.
To change channels, you can either use the up and down buttons to scroll, or directly type in the channel number you want. For example, to jump to Channel 17, you’d simply press 0, 1, 7, and the radio will take you straight there — as long as the person you’re communicating with also has Channel 17 set on their radio, you’ll be able to talk to each other.
One handy feature of the GM-30 is the ability to program two channels at once and quickly toggle between them using the back button, instead of having to reprogram channels every time. For instance, if Channel 17 is set in the first slot, pressing the back button once will switch you over to the second slot (like RPT-8), which you can reprogram to another commonly used channel, such as Channel 5. Some GM-30 models (like the GM-30 Plus) will even monitor both programmed channels simultaneously and let you choose which one to transmit on.
To switch into Frequency Mode — for example, to listen to a local EMS dispatch frequency — simply press and hold the Menu button, then type in the frequency you want to monitor (in the video example, 460.040 MHz). Once you’re done listening and want to go back to communicating with others, just hold the Menu button again to return to Channel Mode.
Step 3: Scan NOAA Weather and Emergency Channels
NOAA (National Oceanic and Atmospheric Administration) broadcasts a set of weather channels that aren’t just for weather updates — they also carry critical emergency alerts and information. This makes them incredibly valuable during a crisis, giving you real-time regional updates beyond just forecasts.
To activate weather scanning, press and hold the back button (the one with the blue cloud icon) for a few extra seconds. This will start scanning through all available NOAA weather channels, and you’ll typically pick up a signal on at least one or two of them.
This feature isn’t just theoretical — during a trip to Mountain City, Tennessee, a broadcast came through one of these weather channels warning about a potential dam break in the area. That’s the kind of critical, life-saving information you can access simply by scanning these channels.
To stop scanning, press the back button again. If you know your local NOAA or regional emergency channel number (for example, Channel 2), you can just set the radio directly to that channel and leave it there to avoid extra static from scanning through unused channels. To exit weather mode and return to your previous screen, hold down the back button again.
Step 4: Adjust the Squelch Setting
Squelch is one of the first menu settings you’ll want to understand, and it controls how the radio filters incoming signals based on strength. Essentially, squelch determines the threshold at which your radio’s speaker turns on in response to a signal.
Here’s the general rule: the lower the squelch number, the weaker (and often staticky) signals your radio will let through the speaker. The higher the squelch number, the stronger and clearer a signal needs to be before the radio lets any sound through.
If you set squelch high (like a 7 or 9), you’ll only hear strong, crystal-clear transmissions, and weaker or distant signals will be filtered out completely. If you’re in an emergency situation and want to catch even faint, broken-up transmissions — like someone calling for help from a weak signal — you’ll want to lower your squelch setting so those transmissions can still come through, even with some static.
By default, many users (including in this video) keep their squelch around a setting of 3. For demonstration purposes, here’s how to change it to a 2:
- Press the Menu button to enter the main menu.
- Use the up or down arrow buttons to scroll until you find the Squelch option (its exact position in the menu can vary).
- Once on the Squelch setting, press the Menu button again, then use the down arrow to lower the value from 3 to 2.
- Confirm the change by pressing the Menu button once more.
- Press the Back button to return to the main screen.
If you find the new setting brings in too much static or unwanted noise, you can always go back in and raise it again.
Step 5: Learn How to Actually Talk on the Radio
Once your channels and settings are configured, using the radio to communicate is simple. On the side of the GM-30, you’ll find a vertical rectangular button — this is your Push-To-Talk (PTT) button, which you hold down whenever you want to transmit.
Here’s the best practice for clear communication: press and hold the PTT button, silently count “one Mississippi” in your head, then say your message, and after you’re done, count “one Mississippi” again before releasing the button.
Why the delay? It prevents you from accidentally cutting off the beginning or end of your message. This is an extremely common mistake — people start talking right as they press the button, or they release it a split second too early, and the first or last part of their sentence never actually gets transmitted. This happens so often that even trained radio operators (including in the military) run into this problem regularly. Building in that one-second buffer before and after you speak ensures your entire message comes through clearly.
Wrapping Up
That covers everything you need to get started with the Radioddity GM-30 right out of the box. At this point, you should know how to:
- Navigate the menu using the four main buttons
- Switch between Channel Mode and Frequency Mode
- Program and toggle between two channels
- Tune into local EMS, fire, or police frequencies for listening
- Scan NOAA weather and emergency channels
- Adjust squelch to hear stronger or weaker signals
- Properly use the push-to-talk button for clear communication
This is genuinely all you need to know to use this radio effectively in a basic emergency preparedness scenario. If you want to go further and explore more advanced features of the GM-30, make sure to subscribe — more in-depth tutorials are on the way to help you get even more out of this radio.