How To Program The Radioddity GM-30 Plus (GMRS Radio Guide)
If you just picked up a Radioddity GM-30 Plus handheld GMRS radio, congratulations — you’ve got a solid, flexible piece of emergency communication gear in your hands. GMRS, or General Mobile Radio Service, is a licensed radio service that allows short-distance two-way communication, and it’s become incredibly popular for family communication, off-grid adventures, and emergency preparedness. But like most handheld radios, the menu system can feel a little intimidating at first.
In this guide, we’re going to walk through everything you need to know to get up and running with your GM-30 Plus. We’ll cover how to navigate the menu system, how to access the built-in NOAA (National Oceanic and Atmospheric Administration) weather alert channels so you can get emergency and weather broadcasts even during a power outage, how to program in custom frequencies like local fire, police, or EMS dispatch, and how to assign those frequencies to a custom channel with scanning enabled. By the end of this post, you’ll have a radio that’s fully set up to help keep you and your family informed and connected during an emergency.
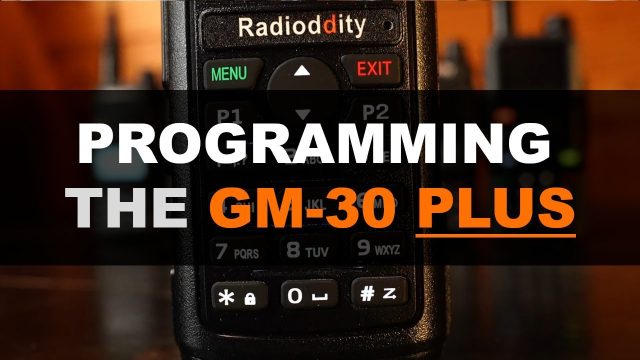
Getting Familiar With the Menu Buttons
Before we start programming anything, it helps to understand the three main buttons you’ll be using to navigate the GM-30 Plus’s menu system:
- Menu button (left side): Pressing this opens the main menu, and it’s also used to select and confirm menu options as you move through the settings.
- Up/Down arrow buttons (middle): These let you scroll through the menu list and cycle through the available options once you’re inside a setting.
- Exit button (right side): This acts as a back button, taking you to the previous menu screen, or backing all the way out of the menu system to the main display.
Step 1: Turn Off the Keypad Beep and Voice Prompts
As a quick way to get comfortable navigating the menu, let’s turn off two annoying default features: the keypad beep (which sounds every time you press a button) and the voice prompt (which reads menu selections out loud).
- Press the Menu button once to open the main menu.
- Use the Down arrow to scroll to Radio Settings, then press Menu again.
- Scroll down to option 9, Voice, and press Menu.
- Use the Up arrow to change the setting to Off, then press Menu to confirm. You’ll see “SAVE OK” confirming the change.
- Scroll down to the Beep option and repeat the same process — press Menu, switch to Off with the Up arrow, and press Menu again to save.
- Press Exit twice to return to the main screen.
Step 2: Access NOAA Weather Alerts
One of the most valuable features of this radio is its built-in access to NOAA weather and emergency alert frequencies. These are pre-programmed channels that broadcast continuous weather updates, severe weather warnings, and other emergency information — extremely useful if the power goes out or a storm is rolling in.
- Locate the 0 key, which has a small squared icon indicating the weather function. Press and hold it to enter the NOAA weather bank.
- Press and hold the Scan button (the button with the “Z”-like symbol next to the pound/hash symbol) to begin scanning through the NOAA frequencies.
- When the radio picks up an active broadcast, it will stop scanning briefly, play the alert or weather report, and then resume scanning.
- To stop scanning and lock onto a specific NOAA frequency, press and hold the Scan button again, then use the Up/Down arrows to manually select the correct frequency for your region.
- To exit the weather mode and return to the main screen, press and hold the same 0/weather key again.
Step 3: Understand the P1 and P2 Buttons
Before programming channels, it’s important to understand two more buttons:
- P1: Toggles between Channel mode and Frequency mode (also called VFO, or Variable Frequency Oscillator mode). In the upper right corner of the display, a number (like 009) means you’re in Channel mode, while “VFO” means you’re in Frequency mode.
- P2: Switches between the top and bottom frequency/channel banks. This radio actually supports dual-watch, meaning it can listen to two frequencies or channels at the same time — one from each bank. This is great for monitoring a GMRS channel and a custom frequency simultaneously.
Step 4: Program In a Standard GMRS Channel
To communicate with other GMRS radios, you’ll want to select a standard channel. Make sure you’re in Channel mode (you’ll see a number like 009 in the upper right corner). Let’s set the radio to Channel 17 as an example:
- Using the keypad, type 0 1 7.
- The radio will now be set to GMRS Channel 17, which corresponds to a frequency of 462.6 MHz.
As long as everyone in your group has their radios set to the same channel, you’ll be able to communicate as long as you’re within range.
Step 5: Program a Custom Frequency
This is where things get really useful. You can program in a custom frequency to monitor local fire department dispatch, EMS/ambulance dispatch, police or sheriff dispatch, or even a ham radio frequency (note: you cannot transmit on ham frequencies without the proper amateur radio license — this is for receiving/monitoring only unless you’re licensed).
- Select the bottom memory bank using the P2 button.
- Make sure you’re in Frequency mode (the display should show “VFO”). Use P1 to switch modes if needed.
- Using the keypad, type in the frequency you want to monitor. In this example, we used a local EMS dispatch frequency: 460.050 MHz.
Once entered, your radio will now be listening to both your GMRS channel (Channel 17, in our example) and your custom EMS frequency at the same time thanks to the dual-watch feature.
Step 6: Assign the Custom Frequency to a Custom Channel
GMRS channels 1–30 are standardized and pre-programmed, so you should never overwrite those. Channels 31–100, however, are open for you to program with your own custom frequencies. In this example, we’ll use Channel 40.
- Press Menu, then scroll down to Program Channel.
- Scroll down to option 15, Channel Memory, and press Menu.
- Scroll down to channel 40 and press Menu again to confirm. You’ll see “SAVE OK.”
- Press Exit twice to return to the main screen.
Now switch to Channel mode using P1, then type 0 4 to pull up Channel 40 — you’ll see your custom EMS frequency now saved there.
Step 7: Enable Scanning on Your Custom Channel
By default, newly programmed custom channels aren’t included when you scan through your GMRS channels. To make sure Channel 40 gets picked up during a scan, you need to enable scanning on it specifically.
- While in Channel mode on Channel 040, press Menu.
- Scroll down to Program Channel, then find the Scan Add option.
- Press Menu, select On, and press Menu again to save.
- Press Exit twice to return to the main screen.
Step 8: Scan All Channels (Including Your Custom Channel)
Now that scanning is enabled for Channel 40, you can scan through all standard GMRS channels plus your custom channel in one pass.
- Press and hold the Scan button (the “Z” symbol) to begin scanning.
- The radio will cycle through all GMRS channels as well as Channel 40.
- Press and hold the Scan button again to stop scanning.
- To return directly to your custom channel, simply type 0 4 0 on the keypad.
Wrapping Up
At this point, you should be fully comfortable with the basic operation of the Radioddity GM-30 Plus. You now know how to:
- Select a standard GMRS channel to communicate with others
- Access and scan NOAA weather and emergency alert frequencies
- Program in a custom frequency (like local fire, police, or EMS dispatch)
- Assign that custom frequency to an open channel slot
- Enable scanning on that custom channel
- Scan across all your GMRS channels, including your custom additions
In the next video, I’ll be covering how to set up this radio to work with GMRS repeaters, which can dramatically extend your communication range. In the meantime, your homework is to research GMRS repeaters in your area — just make sure they’re GMRS-specific repeaters, since you won’t be able to use ham radio repeaters or other services with this radio. Most regions have at least one GMRS repeater available, and hooking into one can make a huge difference in range and reliability.
After that, I’ll also cover how to set up privacy codes to help keep your communications cleaner and more efficient. Thanks for reading, and I’ll see you in the next one!